

Last Updated: October 25, 2026
Quick Summary
An acting demo reel is a short video compilation of your best performances designed to show casting directors and agents your range. Build one by selecting 3 to 5 contrasting scenes that showcase different emotional registers, sequencing your strongest performance first, and editing to 60 to 90 seconds with professional pacing and clear audio.
- Open with your strongest scene in the first 10 to 15 seconds to capture attention immediately.
- Include contrasting scenes showing dramatic, comedic, and character-driven material to demonstrate range.
- Keep your reel between 60 to 90 seconds, with most scenes running 15 to 30 seconds each.
- Self-produced footage is acceptable if the performance is strong and technical execution is competent.
- Include your name, contact information, and agent details at the beginning or end of your reel.
Table of Contents
- What Makes a Professional Acting Demo Reel
- Acting Demo Reel Examples: What Works and Why
- How to Make an Acting Reel With No Experience
- Selecting and Sequencing Your Best Footage
- How Long Should Your Acting Reel Length Be
- Acting Reel Editing Tips and Technical Specifications
- Getting Your Demo Reel in Front of Agents and Casting Directors
- Start Building Your Reel and Advancing Your Acting Career
- Frequently Asked Questions
What Makes a Professional Acting Demo Reel
An acting demo reel is a short video compilation of your best performances, designed to show casting directors and agents your range. It’s your visual resume and often the first impression industry professionals get of your work.
What separates a reel that gets noticed comes down to three things: what you include, how you sequence it, and how polished it looks. A professional acting demo reel doesn’t need to be long or expensive, it needs to be strategic. Every scene should demonstrate something specific, and the whole thing should feel intentional rather than like random footage.
The reels that book auditions lead strong, show range without confusion, and are edited with professional care.
Acting Demo Reel Examples: What Works and Why
A strong reel opens with a scene that immediately shows your acting ability, not your look or credits.
One effective structure moves from a dramatic scene to a comedic moment to a character-driven scene.
Length matters here too. Most professional reels run 1 to 2 minutes, with the strongest material packed into the first 60 seconds.
The footage should feel cinematic, which doesn’t require a RED camera or professional studio.
[PREPARE: For more on how to prepare for the types of scenes you’ll include, check out how to prepare for a commercial audition.]
How to Make an Acting Reel With No Experience
If you don’t have film or TV credits, you’ll need to create footage specifically for your reel, which is common early in a career. Self-produced footage is acceptable, it’s the performance and production quality that matter, not whether the content came from a professional production.
Start by identifying 3 to 5 scenes that showcase different aspects of your ability, drawn from published scripts rather than scenes you write yourself. Learn foundational acting skills through scene study classes to build confidence before filming your reel. Published scenes are well structured and recognizable to casting directors. Pick material you connect with, because that connection will show in your performance.
Self-Produced Scenes and Custom Footage
Creating your own footage means finding a location, getting a camera (your smartphone is fine), and recording the scene with another person reading the other character’s lines off-camera.
The location matters more than the equipment. Find a space appropriate for the scene, a bedroom for an intimate moment, a kitchen for a domestic one. Poor lighting is the biggest technical mistake in self-produced footage. Natural window light works well, so position yourself near a window and avoid overhead fluorescents that create unflattering shadows.
Record at least 5 takes of each scene. You’re looking for one where the performance feels natural, the emotional choices are clear, and the technical execution is solid, meaning you hit your marks, hold a consistent eye line, and deliver dialogue at a conversational pace. You’ll notice the difference between a take where you’re thinking about the performance and one where you’re living it.
Collaboration and Budget Considerations
Finding someone to read opposite you is crucial, whether a friend, another actor, or someone from a local acting class. They don’t need to be strong, just consistent and present.
Recording equipment is minimal: a good smartphone camera, a tripod or stabilizer to prevent shaky footage, and a simple reflector for bright outdoor shoots. None of this requires significant investment.
The real cost comes in post-production if you hire an editor. Editing your own footage is possible with basic software, but a professional editor ensures a polished reel cut to proper pacing.
Selecting and Sequencing Your Best Footage
Once you have footage, whether self-produced or from previous acting work, the next step is choosing which scenes to include and in what order. This is where strategy matters most.
Leading With Your Strongest Performance
Your opening clip is your first impression, so it should be a scene where your acting is undeniably strong and the scene itself engaging.
Strong opening scenes show clear emotional stakes. A moment where you’re vulnerable, conflicted, or deeply present works better than delivering exposition.
The opening clip should also show your face clearly lit. Avoid wide shots where you’re small in the frame or scenes shot in dim lighting. Your face is your instrument, make sure it’s seen.
Choosing Contrasting Scenes and Character Types
After the opening, include scenes that demonstrate range. If your first clip is a serious dramatic moment, the second or third should show comedic timing, a lighter tone, or a different character type.
Contrasting scenes should still feel cohesive.
A common structure includes a dramatic scene, a comedic scene, and a character-driven scene. This shows emotional range, comedic timing, and the ability to inhabit different character types.
[PRACTICE: To improve your performance before filming, explore how to practice acting at home alone to refine your craft.]
Join our acting classes in Ventura today! →
How Long Should Your Acting Reel Length Be
The ideal acting reel length is 60 to 90 seconds, the industry standard. A 60-second reel gives you room for 3 to 4 strong scenes, and a 90-second reel accommodates 4 to 5 without feeling rushed.
A tightly edited 45-second reel with three exceptional scenes beats a bloated 2-minute reel with filler. Quality and pacing matter more than duration, so if you only have two genuinely strong scenes, make a 45-second reel and don’t pad it with mediocre footage.
Pacing should feel intentional. Each scene should play long enough to understand what’s happening and see your performance, but not so long that the reel drags.
Acting Reel Editing Tips and Technical Specifications
Editing is where your reel comes together. The technical execution here directly impacts how professional your reel appears.
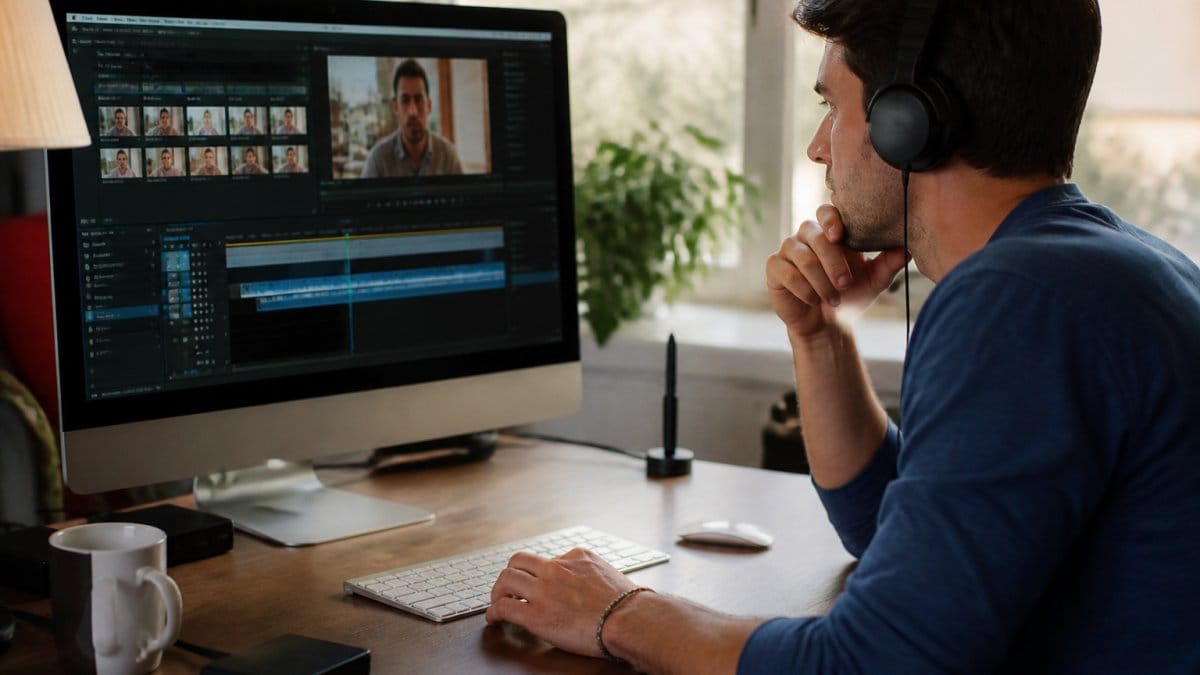
Refining the pacing and narrative arc of your clips requires a keen eye for tension similar to the techniques used when creating professional trailers to ensure each cut maintains the viewer’s undivided attention.
Importing, Cutting, and Assembling Footage
Import all your footage into editing software such as Adobe Premiere Pro, Final Cut Pro, or free DaVinci Resolve. Organize it into folders by scene or performance quality so you can easily locate the best takes.
Create a timeline and drag your opening scene in first as your anchor, then add scenes in your planned sequence.
Cut out dead space. Trim moments where nothing happens and tighten long pauses.
Adding Professional Identifying Information
Your reel should include your name, contact information, and agency representation if you have it, typically at the beginning or end of the reel or as an overlay on the opening scene.
Keep the text simple and readable with a clean font, adequate size, and sufficient contrast.
Include your phone number and email address. If you have an agent, include their contact information instead of your personal details, since agents prefer to field inquiries.
Voice Acting Versus On-Camera Reels
A voice acting reel, also called a voice demo, is structured differently: it typically runs 1 to 2 minutes and features 4 to 6 different voice types or character voices, each clip running 10 to 20 seconds.
Voice reels are audio-only, though many voice actors add a simple visual element like a still image, logo, or animated text so the file can be posted on video platforms.
A voice reel still leads strong: open with your best, most versatile voice, then show range across character types like young, mature, comedic, dramatic, and commercial.
Getting Your Demo Reel in Front of Agents and Casting Directors
Once your reel is finished, your reel is only effective if the people who cast roles actually see it.
If you’re pursuing agent representation, your reel is part of your submission package, since agents want to see your demo reel before agreeing to represent you.
[RESUME: To round out your submission materials, see what to include in an acting resume to ensure your complete package is professional.]
Start Building Your Reel and Advancing Your Acting Career
Building a professional acting demo reel is one of the most important steps in launching an acting career. Your reel is your calling card, demonstrating your ability, range, and professionalism to the people who make casting decisions.
The process starts with honest assessment of what footage you have and what you need to create. It continues through careful scene selection, intentional sequencing, and professional editing.
At Ventura Actors Studio, we work with actors to refine their craft before they step in front of a camera.
| Element | Purpose | Typical Duration |
|---|---|---|
| Opening clip | Immediate impression | 15-30 seconds |
| Range demonstration | Show versatility | 45-60 seconds total |
| Closing clip | Strong final impression | 15-20 seconds |
| Identifying information | Contact and credits | Static or overlay |
Frequently Asked Questions
How long should an acting demo reel be?
A professional acting demo reel should be 1 to 2 minutes long. Casting directors and agents typically spend 30 seconds to 1 minute reviewing each submission, so concise reels that showcase your strongest material get watched in full. Anything longer than 2 minutes risks losing attention before your best scenes appear. Every second counts, include only your most compelling footage.
Can you make an acting reel without prior film experience?
Yes. Beginners can create a reel by filming self-produced scenes, collaborating with other actors, or working with student filmmakers. You don’t need professional credits to start; you need footage that demonstrates your acting ability. Self-produced scenes filmed on a smartphone with good lighting and clear audio can work. Many successful actors began with DIY reels before landing professional roles.
What should you include in an acting demo reel?
Include 3 to 5 contrasting scenes that showcase different character types and emotional ranges. Lead with your strongest performance. Each scene should be 15 to 30 seconds and demonstrate clear acting ability, dialogue, emotional depth, and on-camera presence matter most. Add your name and contact information on screen. Avoid filler, music that distracts, or scenes where your performance is unclear.
How do you get your demo reel noticed by agents and casting directors?
Submit your reel through official casting platforms, agent submission portals, or casting calls that request demo reels. Include it in your submission materials alongside your resume and headshot. Make sure your contact information is clearly visible on the reel itself. Quality matters more than quantity, a polished 1.5-minute reel with strong footage will get more attention than a longer, unfocused one.
What’s the difference between an acting reel and a voice acting demo?
An acting reel showcases on-camera performance with visual footage and dialogue. A voice acting demo reel features only audio of your voice performing different characters, accents, and emotional ranges without video. Voice reels are typically 1 to 2 minutes and focus on vocal versatility. On-camera reels emphasize physical presence, facial expressions, and scene work. Choose the format that matches the roles you’re pursuing.
How much does it cost to create a professional acting demo reel?
Costs vary widely. Self-produced reels using smartphone footage and free editing software cost little to nothing. Hiring a videographer or working with a production company typically ranges from a few hundred to several thousand dollars depending on the scope and complexity. Many actors start with DIY approaches and upgrade as their careers progress. Focus on quality footage over budget, a well-shot self-produced scene beats expensive footage that doesn’t showcase your acting.
Your reel is the bridge between your training and your opportunities. Invest time in making it strong, keep it updated as your career progresses, and use it consistently in every submission. The casting directors and agents who see your best work are the ones who’ll call you in for auditions that matter.


Related Posts
Best Acting Resume Fonts and Layouts That Book Roles
Your acting resume fonts and layout decide your first impression. Compare…


Is Professional Acting Training Worth the Cost?
Before you pay for acting training, total tuition, living costs, lost income…

Professional Acting Training for Kids: What Parents Should Check
Acting training for kids can build confidence, but program quality varies…